Window Resizing and Proportionality - Demo 03
Demo 03
Problem With Previous Demo
When running Demo02, if the user resizes the windows, then the paddles lose their proportionality, as NDC no longer is mapped to a square screen-space.
How to Execute
Load src/modelviewprojection/demo03.py in Spyder and hit the play button.
Objective
Modify the previous demo, so that if the user resizes the window of the OpenGL program, that the picture does not become distorted.
Create procedure to ensure proportionality.
Keeping the Paddles Proportional
In the previous demo, if the user resized the window, the paddles appear distorted, as they were shrunk in one direction if the window became too thin or too fat.

Yuck

Yuck
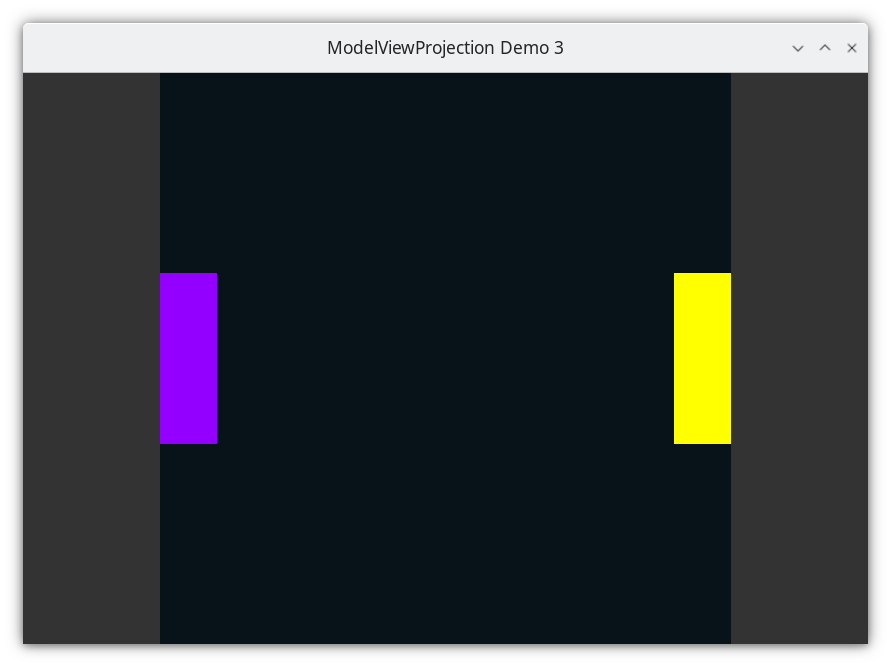
Assume that this is a problem for the application we are making, how could we solve it and keep proportionality regardless of the dimensions of the window? Ideally, we would like to draw our paddles with a black background within a square region in the center of the window, regardless of the dimensions of the window.
OpenGL has a solution for us. The viewport is a rectangular region contained within the window into which OpenGL will render. By specifying a viewport, OpenGL will convert the NDC to the sub-window space of the viewport, instead of the whole window.

Nice
Demo 03
Because we will only draw in a subset of the window, and because all subsequent chapters will use this functionality, I have created a procedure for use in all chapters named “draw_in_square_viewport”.
Code
GLFW/OpenGL Initialization
The setup code is the same as the previous demo’s setup. Initialize GLFW. Set the OpenGL version. Create the window. Set a key handler for closing. Execute the event/drawing loop. The only code showed in this book will be the relevant parts. Consult the python source for the full, working code.
Set to Draw in Square Subsection Of Window
53def draw_in_square_viewport() -> None:
declare a function to configure OpenGL to draw only in a square subset of the monitor, i.e. the viewport
57    GL.glClearColor(0.2, 0.2, 0.2, 1.0)
58    GL.glClear(GL.GL_COLOR_BUFFER_BIT)
set the clear color to be gray.
glClear clear the color of every pixel in the whole frame buffer, independent of viewport. So now the entire framebuffer is gray.
62    w, h = glfw.get_framebuffer_size(window)
63
64    square_size = w if w < h else h
figure out the minimum dimension of the window. In the image above, the “square_size” is 1200, as the monitor’s vertical screen-space is only 1200 pixels tall.
To make a square sub-region, we need a number for the distance between vertices of the square. By using the minimum of the width and height, we can at least fill up the screen in one dimension.
68    GL.glEnable(GL.GL_SCISSOR_TEST)
69    GL.glScissor(
70        int((w - square_size) / 2.0),  # bottom left x_screenspace
71        int((h - square_size) / 2.0),  # bottom left y_screenspace
72        square_size,  # x width, screenspace
73        square_size,  # y height, screenspace
74    )
Enable the scissor test. Internally, OpenGL drivers likely have global variables that we set by calling functions. Every OpenGL feature isn’t used by every OpenGL program. For instance, we are not using lighting to add realism. We aren’t using texturing. We are using the scissor test, so we must enable it. We only enable the features that we need so that the OpenGL driver doesn’t waste time doing unnecessary computations.
Note that it’s not clear what the arguments mean, so the author added comments after each argument. Another way to make this more clear is to use Python’s keyword arguments, discussed later.
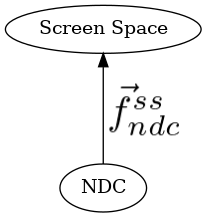
the scissor test allows us to specify a region of the framebuffer into which the OpenGL operations will apply. In this case, the color in every pixel in the framebuffer is currently gray because of the existing class to glClearColor. By calling glScissor, we are setting a value in each fragment (i.e., pixel) on a square region of pixels to be true (and false everywhere else) which means “only do the OpenGL call on these fragments, ignore the others”. As we will learn later, OpenGL stores much more information per fragment (i.e. pixel) than just its current color.

Look at the image above of NDC superimposed on Screen Space. From this, the arguments sent to glScissor should be clear.
78    GL.glClearColor(0.0289, 0.071875, 0.0972, 1.0)
79    GL.glClear(GL.GL_COLOR_BUFFER_BIT)
glClear will only update the square to black values.
82 GL.glDisable(GL.GL_SCISSOR_TEST)
disable the scissor test, so now any OpenGL calls will happen as usual.
So we’ve drawn black into a square, and disabled the scissor test, so any subsequent OpenGL calls will still be drawn into the full framebuffer. But, we only want to draw within the black square, and the scissor test does not modify the NDC to screen-space transformations. To modify the NDC to screen-space transformations, we set the viewport again, so that the NDC coordinates will be mapped the the region of screen coordinates that we care about, which is the black square.
85    GL.glViewport(
86        int(0.0 + (w - square_size) / 2.0),
87        int(0.0 + (h - square_size) / 2.0),
88        square_size,
89        square_size,
90    )
The Event Loop
This demo’s event loop is just like the previous demo, but this time we call the procedure to ensure that we only draw in a square subset of the window.
 95while not glfw.window_should_close(window):
 96    glfw.poll_events()
 97
 98    width, height = glfw.get_framebuffer_size(window)
 99    GL.glViewport(0, 0, width, height)
100    GL.glClear(sum([GL.GL_COLOR_BUFFER_BIT, GL.GL_DEPTH_BUFFER_BIT]))
104 draw_in_square_viewport()
The event loop is the same as the previous demo, except that we call draw_in_square_viewport every frame at the beginning.
107    GL.glColor3f(0.578123, 0.0, 1.0)
108    GL.glBegin(GL.GL_QUADS)
109    GL.glVertex2f(-1.0, -0.3)
110    GL.glVertex2f(-0.8, -0.3)
111    GL.glVertex2f(-0.8, 0.3)
112    GL.glVertex2f(-1.0, 0.3)
113    GL.glEnd()
114
115    GL.glColor3f(1.0, 1.0, 0.0)
116    GL.glBegin(GL.GL_QUADS)
117
118    GL.glVertex2f(0.8, -0.3)
119    GL.glVertex2f(1.0, -0.3)
120    GL.glVertex2f(1.0, 0.3)
121    GL.glVertex2f(0.8, 0.3)
122    GL.glEnd()
123
124    glfw.swap_buffers(window)